
 EN
EN ES
ES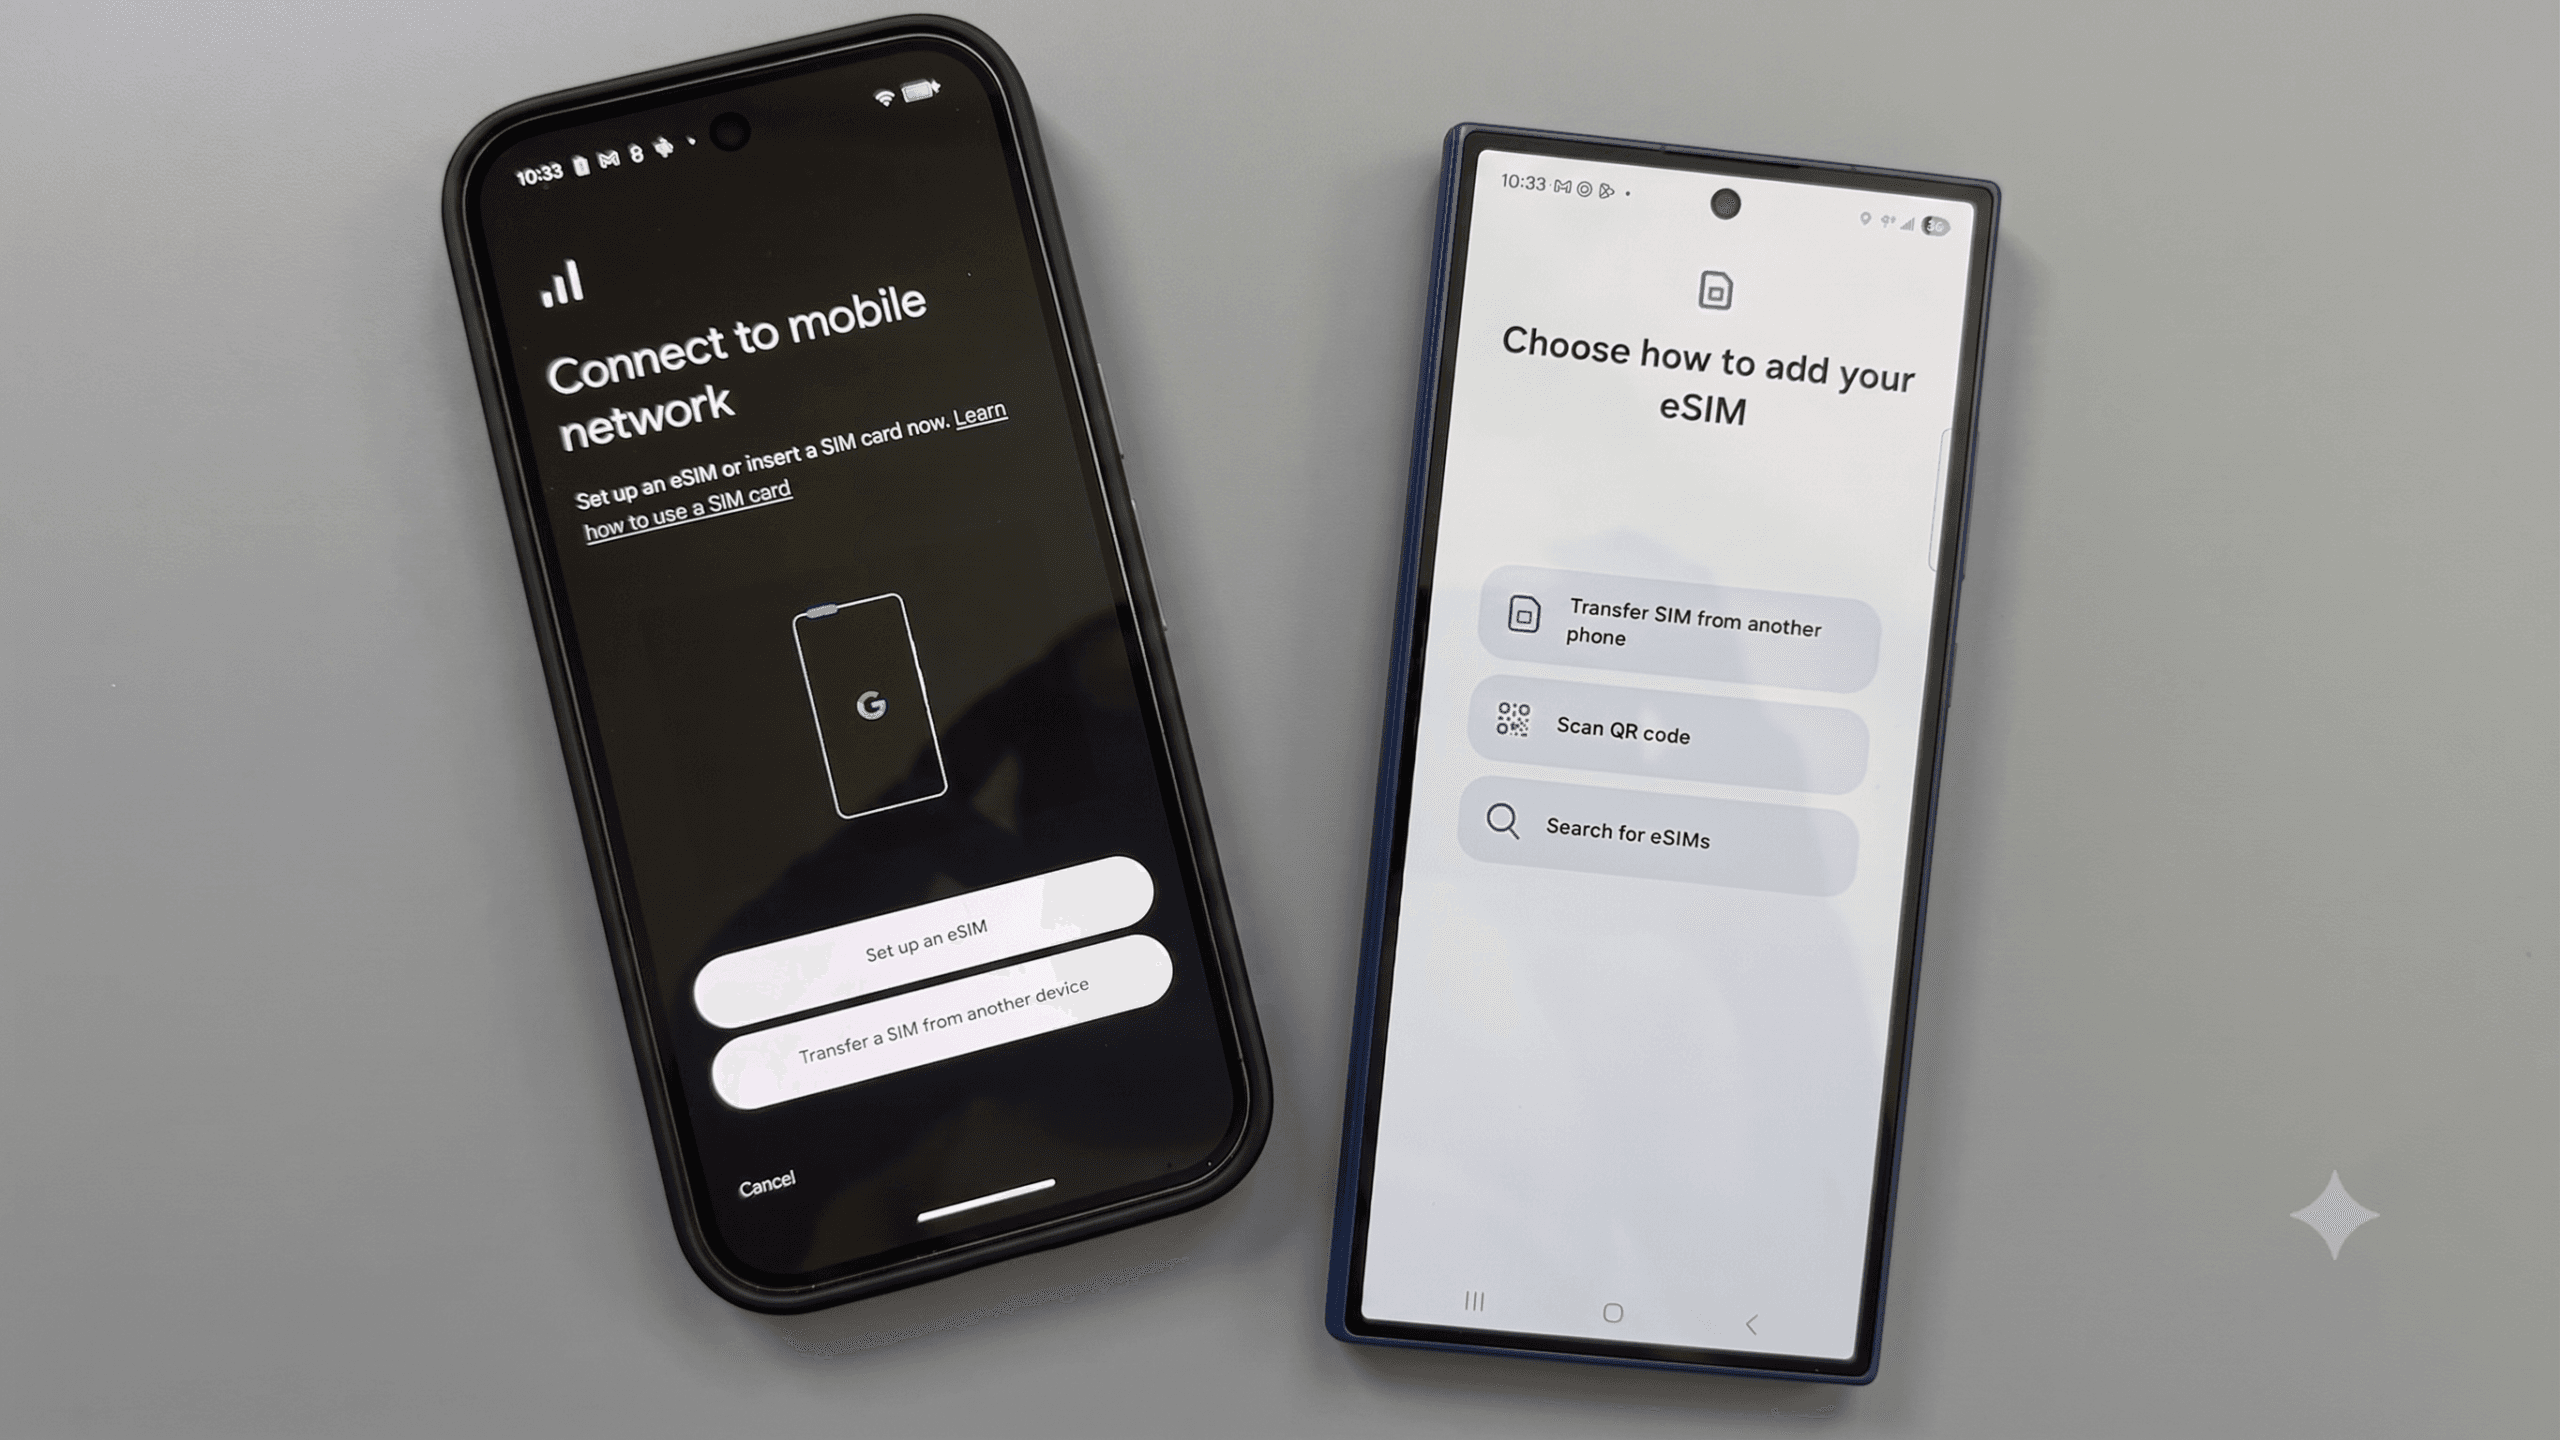
eSIM technology has made mobile connectivity faster, simpler, and more convenient than ever. Instead of inserting a physical SIM card into your phone, you can now activate a mobile plan digitally in just a few minutes.
This technology is especially useful for travelers who need to connect to the internet immediately when traveling abroad without having to swap physical SIM cards.
As more Android phones incorporate this feature, many users want to know how to install an eSIM on Android.
The setup process might seem complicated if it's your first time using an eSIM. However, most Android devices allow you to complete the process quickly by following the instructions.
Once installed, you can enjoy a stable mobile connection for traveling, working, or using the internet in your daily life.
In this guide you will find everything you need to know about installing an eSIM on Android, from checking compatibility to activation, setup and troubleshooting.
What is an eSIM?
Before learning how to install an eSIM on Android, it's important to understand what this technology is and how it works.
An eSIM, also known as an embedded SIM, is a digital SIM card built directly into the device. It works similarly to a traditional SIM card, but doesn't require a physical chip.
To understand how a travel eSIM worksyou need to know that instead of inserting a card into the phone's tray, you can download and activate a mobile plan digitally. Most providers send a QR code or the necessary details to complete the installation.
Once activated, the eSIM connects the phone to a mobile network to use calls, messages and data, depending on the plan purchased.
Its main advantage is convenience, as you don't need to visit a store or exchange physical cards.
Check if your Android phone supports eSIM
The first step in learning how to install an eSIM on Android is to check if the device is compatible with this technology.
Not all phones are compatible with eSIM . Most flagship devices from brands like Samsung, Google Pixel, Motorola, and some Xiaomi devices support eSIM, but many older or budget models do not.
Even if the model is compatible, there may also be restrictions imposed by the mobile operator.
To verify this:
- Open Settings.
- Access Connections or Networks and Internet.
- Select SIM Manager or Mobile Network.
- Look for the option Add eSIM, Download SIM or Add mobile plan.
If any of these options appear, your phone is probably compatible.
This check must be done before purchasing any plan.
Prepare yourself before starting the installation
Before starting the process, make sure you have everything you need.
You will typically need:
- A stable Wi-Fi connection
- The QR code provided by the supplier
- Activation data
- A compatible Android device
- Enough battery in the phone
If you want to know how to set up an eSIM on Android without interruptions, preparation is essential.
It is also recommended to install any pending operating system updates before starting.
Step 1: Open the SIM Manager
The first step in the installation is to access the SIM card settings.
On most Android devices you must:
- Open Settings.
- Select Connections or Networks and Internet.
- Enter SIM Manager or Mobile Network.
Menu names may vary slightly depending on the brand and version of Android.
From this section you can manage physical SIM cards and installed eSIM profiles.
Following these steps correctly to install eSIM on Android makes the process considerably easier.
Step 2: Select Add eSIM
Within the SIM Manager, look for the option to add a new eSIM.
It may appear under one of these names:
- Add eSIM
- Download SIM
- Add mobile plan
- Download a new eSIM
Click on the available option to begin.
The device will show you the necessary instructions to download and activate the new mobile plan.
Step 3: Scan the QR code
After you purchase your plan, the provider will usually send you a QR code via email, through an app, or in the user area.
When you select the option to add an eSIM, the phone will automatically open the camera to scan the code.
Place the QR code within the indicated area on the screen and wait for the device to recognize it.
Once scanned, the phone will begin downloading the eSIM profile.
Maintain a stable Wi-Fi connection throughout the process and avoid closing the settings screen.
Remember that some QR codes can only be scanned once.
Step 4: Download and install the eSIM profile
After scanning the code, the device will download the profile from the provider's servers.
This process usually takes a few minutes.
Once the download is complete, your phone will ask you to confirm the installation. Follow the on-screen instructions and accept the necessary terms and conditions.
Once completed, the new eSIM will appear in the SIM Manager.
At this point, the profile will already be installed, but you will still need to review some settings to use the connection correctly.
Step 5: Configure eSIM settings
After installing it, you need to decide what functions you want to use it for.
The eSIM setup on Android typically allows you to choose:
- The default SIM for calls
- The default SIM for messages
- The SIM used for mobile data
- The name of the new plan
- Automatic data change
These options are especially useful on dual SIM phones.
During a trip, you can keep your regular SIM card to receive calls and messages, while using the eSIM to access the internet.
This combination offers flexibility and helps avoid high roaming charges.
Step 6: Activate mobile data
Once the profile is installed, check that mobile data is enabled for the eSIM.
Generally, you should follow these steps:
- Open Settings.
- Access Connections or Mobile Networks.
- Select the new eSIM.
- Activate mobile data.
- Activate Data Roaming if you are abroad.
To activate eSIM on an Android phone correctly, it is essential to select the new plan as the mobile data source.
Although the word “roaming” may sound worrying, activating it does not mean that your usual operator will charge you roaming fees if the data is correctly allocated to the travel eSIM.
Always check which card is selected for data before you start browsing.
Common problems during installation
La mayoría de las instalaciones se completan sin dificultades, pero algunos usuarios pueden encontrar errores.
The most common problems include:
- The QR code is not scanned
- The profile is not downloaded
- The eSIM does not appear in the settings
- There is no network connection
- Activation fails
- Mobile data is not working
Problems activating an eSIM on Android are usually related to an unstable Wi-Fi connection, an incompatible device, incorrect settings, or carrier restrictions.
It is also possible that the QR code has expired or has already been used previously.
Tips for troubleshooting
If the eSIM doesn't work immediately, try these solutions:
- Restart your phone.
- Check that the eSIM is activated.
- Select the eSIM to use mobile data.
- Check your roaming settings.
- Confirm that the QR code is still valid.
- Update your Android operating system.
- Turn airplane mode on and off.
- Manually select a mobile network.
- Check your APN settings.
In many cases, restarting the phone or activating airplane mode for a few seconds can fix connection problems.
If the problem persists, contact your eSIM provider before deleting the profile. This step can help you resolve common eSIM issues, as some codes cannot be reused after the profile is deleted.
Why eSIM is a good option for Android
eSIM technology offers significant advantages for Android users.
Its main benefits include:
- Quick activation
- No physical card required
- Easy connectivity during travel
- Dual SIM compatibility
- Easy switching between plans
- Greater comfort and flexibility
For travelers, an eSIM eliminates the need to buy local SIM cards, search for stores upon arrival, or rely on expensive roaming plans.
You can install the plan before you leave and activate it when you arrive at your destination.
This makes the eSIM one of the most practical connectivity solutions for international travel.
Why Blink eSIM makes installation easier
Blink eSIM offers a simple process for Android users to connect without complicated setups.
With Blink eSIM, travelers get:
- Activation via QR code
- 4G/5G coverage in more than 190 countries
- Quick installation
- Affordable plans
- Hotspot compatibility
- Simple plan management
Blink is designed to make installation easy, even for those using an eSIM for the first time.
You can buy the plan before your trip, install it from home, and connect when you arrive at your destination.
Final reflections
Learning how to install an eSIM on Android is easier than many people think. Once you know the procedure, installation usually only takes a few minutes.
The main steps involve checking device compatibility, scanning the QR code, downloading the profile, selecting the eSIM for mobile data, and activating roaming when necessary.
With proper configuration, your Android device can provide you with a stable connection for traveling, working, and using the internet daily.
As this technology continues to grow, more users are choosing digital connectivity for its convenience and flexibility.
Travel smarter and stay connected. Create your Blink eSIM account, select your plan and access the internet from the moment you arrive at your destination.
Frequently Asked Questions
Can all Android phones use an eSIM?
No. Only compatible Android devices include this technology. Check your model's specifications and carrier restrictions before purchasing a plan.
How long does it take to install an eSIM?
The process usually takes between 2 and 10 minutes, depending on the device, Wi-Fi connection, and provider.
Can I use an eSIM and a physical SIM card at the same time?
Yes. Many Android phones support dual SIM, combining a physical card with an eSIM.
Do I need internet to install an eSIM?
Yes. You need a stable Wi-Fi connection to download and install the profile.
Should I activate data roaming?
Yes, you usually need to activate roaming to use a travel eSIM in another country. Make sure the eSIM is set to mobile data.
Is Blink eSIM easy to use on Android?
Yes. Blink eSIM offers QR code setup and a simple activation process for compatible devices.